

DIY: Dorm Hacks
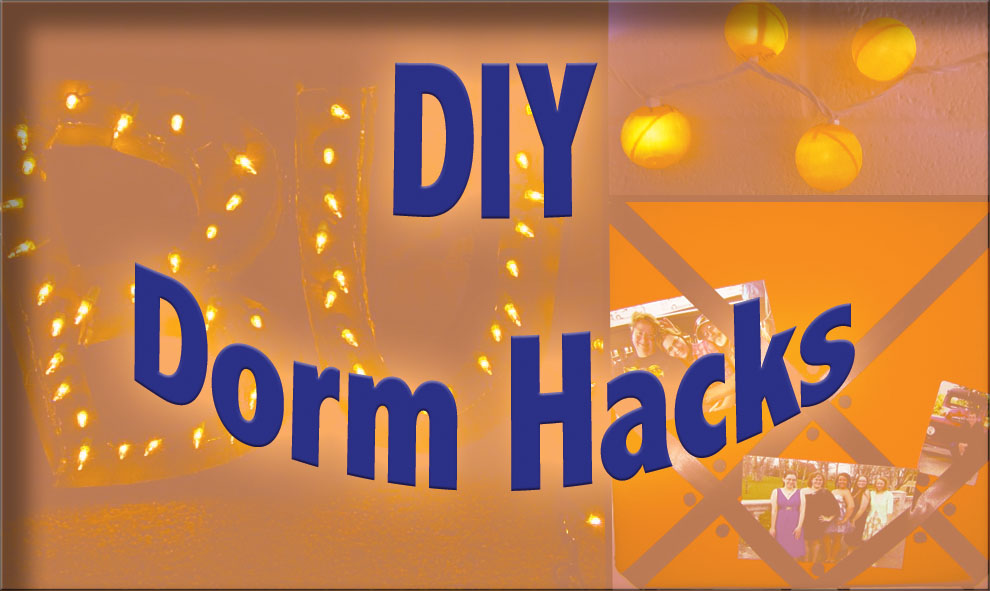
Image by Sarah Baker.
These following dorm room hacks can help spruce up your dorm room and help you organize your college life so when you set through your door you enter your very own sanctuary.
MARQUEE LIGHTS
What you need:
- Black foam board or cardboard
- Hot glue gun
- Strand of lights
- Scissors
- Pen
- Ruler
Instructions
- Take cardboard or foam board and stencil design of letters and cut them out.
- Cut out one inch wide strips of board.
- Glue the strips along the side border of your letters, you may need to bend the boards beforehand. Once all has been glued together, your letters should be looking like 3D block letters.
- Using your pen or scissors stab holes about one inch apart in the middle of your letter.
- Optional: You can paint your letters if you want. If you use black board and clear glue, you probably don’t need to.
- Place lights in holes. For best effect push lights through to the top of their heads where they meet the wires. Depending on the number of holes you have, you may have extra lights in your strand. Either make another marquee for them or just let them be.
- Plug in and enjoy!
RIBBON BOARD
What you need:
- Ribbon, at least 10 ft.
- 2 two foot squares of fabric, or 1 an XXL t-shirt
- Hot glue gun and/or staple gun
- Cotton, foam or square of padding
- Brackets, or some wall hanging device
- A frame
- Make square wooden frame with thin board backing
- Or use a canvas
- Or resuse the frame form an old ribbon board
Any buttons, beads or random bobbles for decoration
Instructions
- Take your frame and staple or glue cotton padding to top side of frame.
- Wrap your fabric tauntly over the front of the frame and cut off excess fabric.
- Staple, or hot glue, fabric to frame, corners first.
- Layout your ribbon in a desired pattern then glue each loose end to back of the frame and glue spots where ribbons intersect.
- Add any additional decorations, such as buttons or beads, at this stage.
- Hot glue brackets to the frame. (make sure they will be positioned correctly so the board is will be right side up when hung on the wall)
PING PONG BALL DORM LIGHTS
What you need:
- Table tennis balls
- Pen
- Strand(s) of lights
Instructions
- Take table tennis balls out of packaging and place on a flat surface. Think of how the color of the plastic and the color of the lights will work together to create a cool color you like.
- Using the pointed end of the pen, poke a hole in the middle of each ball. If the balls have a logo on them, try to poke the hole in the center of the logo. Make sure the pen goes through the first side and touches the other without puncturing the other side.
- Repeat step 2 until all ping pong balls have a hole.
- Hang your strand of lights in the desired location.
- Slide each individual bulb into the hole of a single ball. Be sure to slide the ball up over the edge of the plastic connector for best hold.


